Running a functional eCommerce business is like cooking a meal with many ingredients. Each ingredient is essential and can significantly impact the final dish.
Product organization is one of them.
Even though most merchants don’t pay attention to this detail, it’s one of the most essential parts of the business.
Not only does this make the entire shopper journey a lot more convenient, but it will also help you keep a better eye on all your products.
In this article, we will share a few tips to help you with product organization within your Shopify store.
Stay tuned!
Categorize Your Products By Using Collections
With the assistance of Shopify, you will be able to categorize your products using special collections.
This is an effective tool for grouping products with identical characteristics (type, gender, color, seasons, and many more).
For instance, if you're selling electronics, then you should probably have the following collections:
- Mobile phones
- Tablets
- Laptops
- Cases
- Headphones
You can easily rename your collections as your business goals change.
In addition, there are two types of collections, manual and automated.
In the manual collection, you will need to enter products one by one.
On the other hand, automated collections add products based on the specific conditions you set (product tag, price, product type, weight, inventory, etc.).
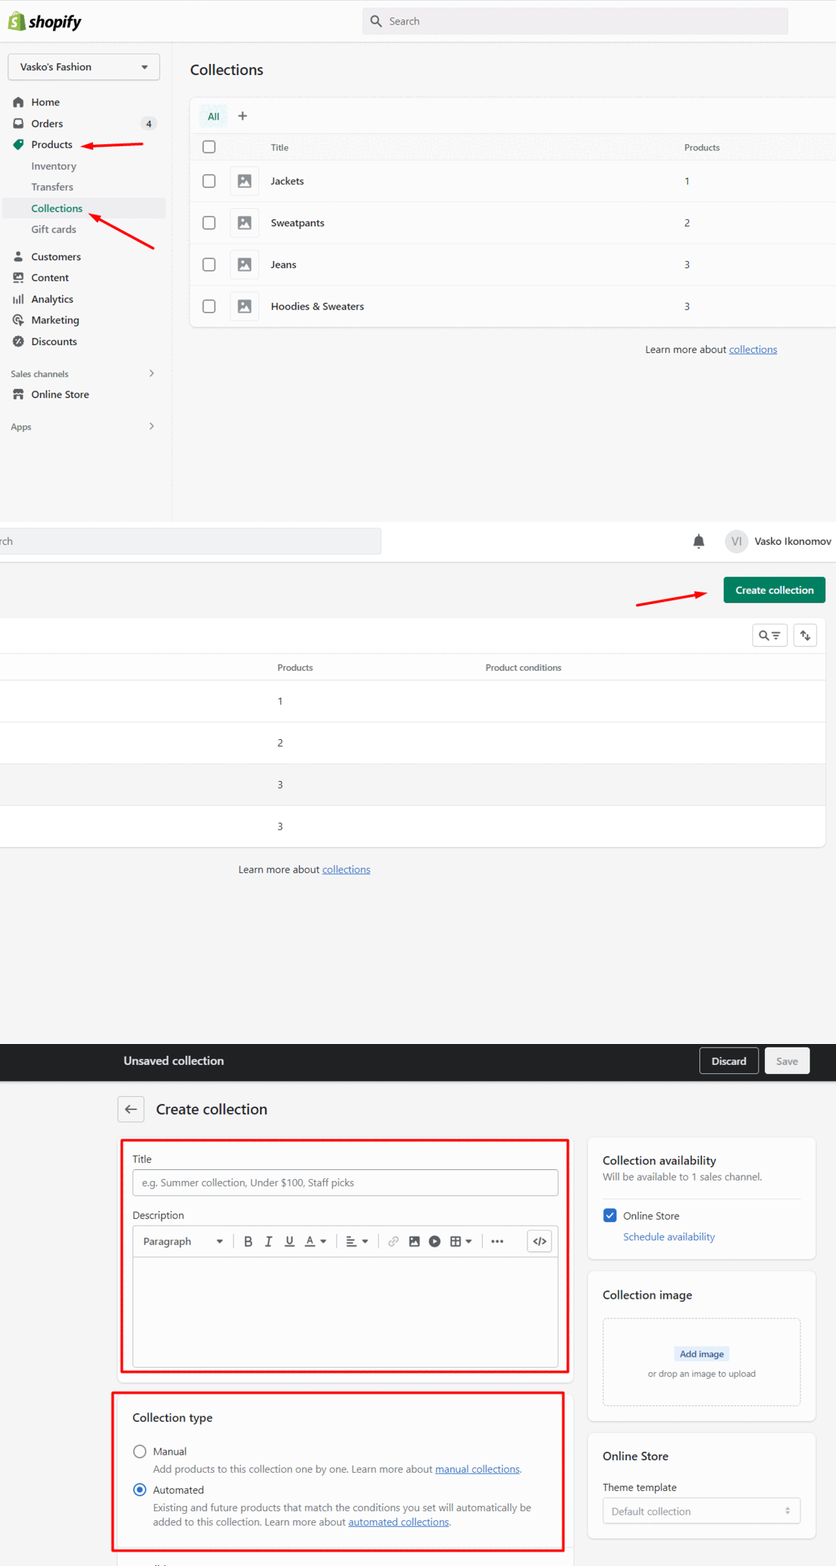
To access your collections or create new ones, you will be required to follow the next steps:
- Go to your official Shopify dashboard
- Select the "Products" tab on the left and open "Collections"
- You can instantly create a brand-new collection by clicking "Create Collection"
- Also, you can edit your existing ones in the panel.

Employ Product Tags
Tags (also known as sub-categories) are mainly employed within collections to narrow them down.
This will help users to search for a specific term within your collection.
For instance, "Apple" in laptops or "Bose" in headphones.
Not only does this make the browsing process significantly faster, but it also makes it smoother.
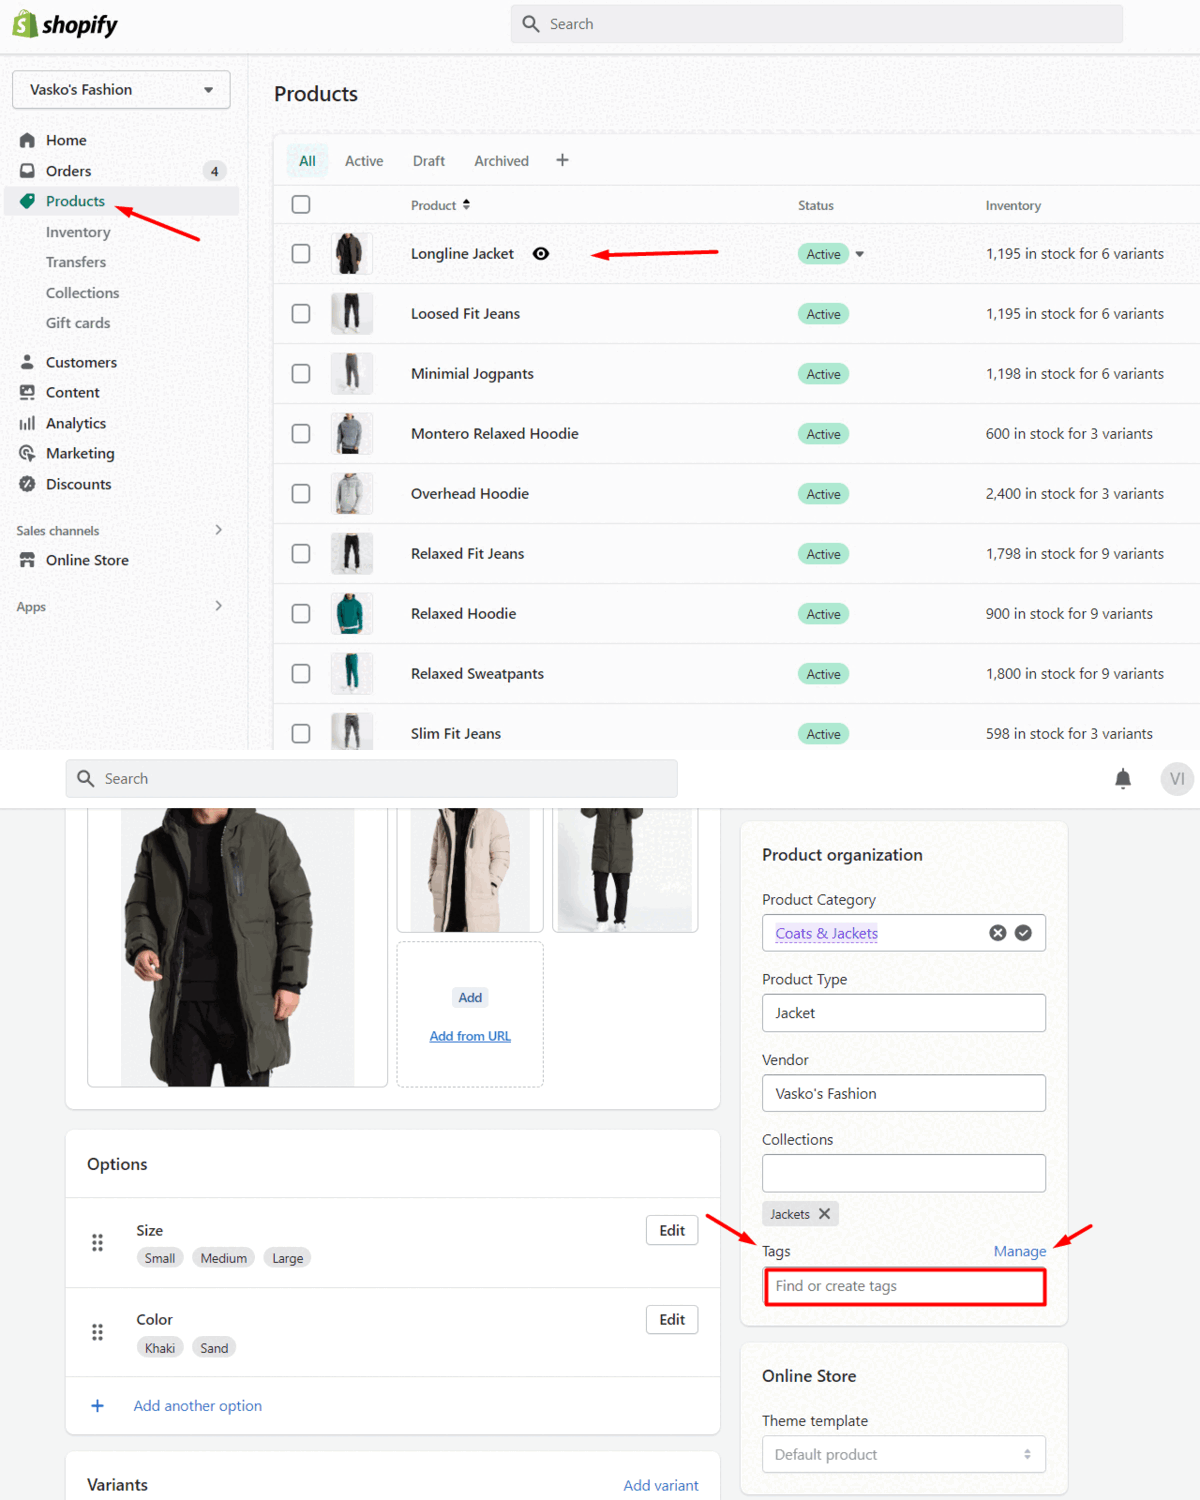
To create a new tag, you will need to approach the following steps:
- Go to your official Shopify dashboard
- Select the "Products" tab on the left
- Open a product and view the “Product Organization” section on the right
- Enter the necessary tags in the “Tags” section
- Also, you can manage all of your existing ones by clicking the “Manage” button.
Just keep in mind that the way the “Collections" appear on your website will primarily depend on your theme.

Pick Out A Nice Theme
Having a nice theme is incredibly important in this day and age. This will make your product organization a lot more convenient.
If you don’t have a big budget to spend on a custom theme, you can select one of the most popular free options on Shopify.

Plan Out The Structure
Lastly, make sure you take a moment to successfully organize and plan out the entire structure of your collections.
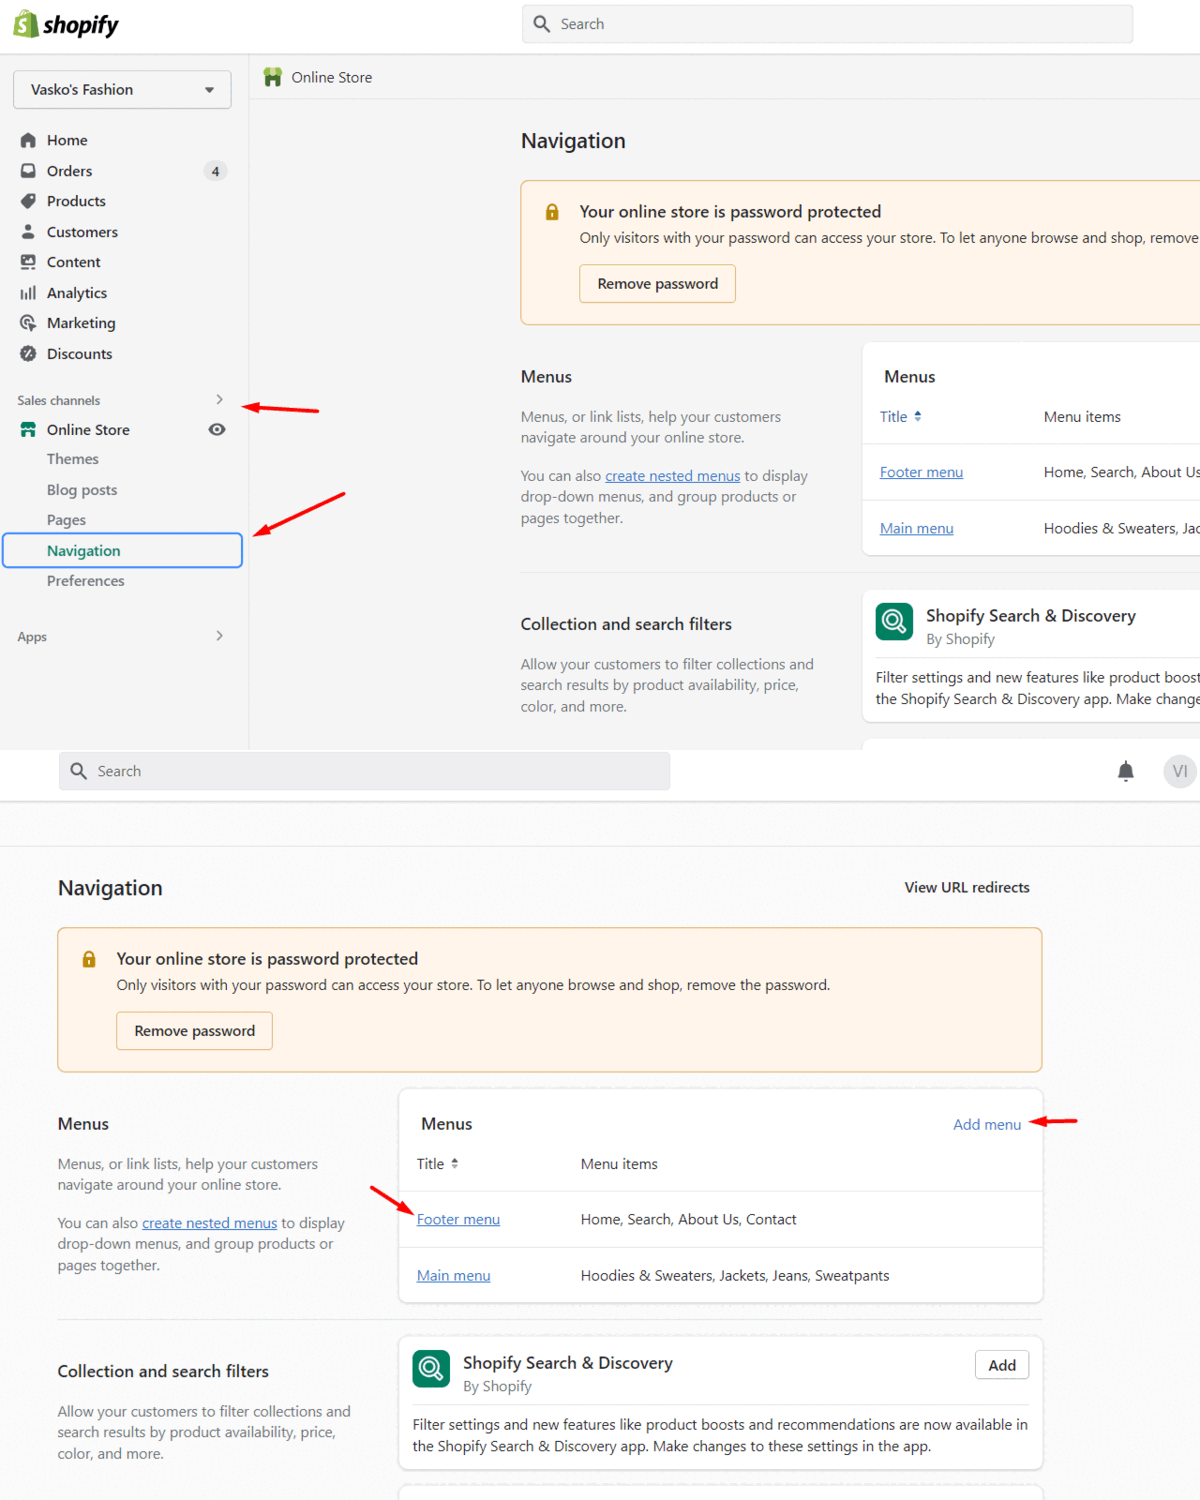
- Go to your “Sales Channels” and select “Navigation”
- In this section, you can successfully organize your collection in different menus
- You can add a new menu by clicking the “Add menu” button or edit an existing one by clicking it.
- Once you're in the menu's settings, you can easily rearrange the items, edit them, and add new ones.

Conclusion
As Larry Burkett once said, “In business, organization is an absolute necessity, not an alternative”.
With our techniques, you will be able to categorize each product in the most convenient way possible.
If you want to continue reading, check this out!


